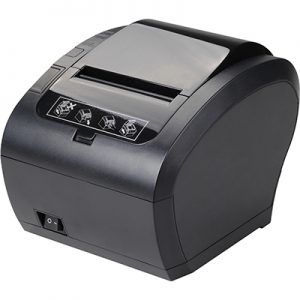
The principle of the thermal printer is heated after a while, which becomes a dark (usually black or blue) film covered with a layer of pale material (usually paper) transparent film. Image Heating is created by the chemical reaction created in the film. This chemical reaction is not at a certain temperature. High temperatures can speed up the chemical reaction. When the temperature is below 60,, the film should go with a long as many years as even being dark; and when its temperature is 200 ℃, this reflection will be completed within a few microseconds. By selecting a thermal printer, it is heated to a predetermined position on the corresponding graphical thermal paper. The contact with the heat sensitive material is provided by a small electric heater with the print head. The heater forms a heating element arranged in square dots or strips guided by the printer logic control with the corresponding graphic on the thermal paper. Heating elements are controlled by logic circuit but also controlling feed can get graphic label or printing on all paper.
We download the zy-306 printer driver from our site. We are running V8.0.exe in the Windows driver folder. Next. Next again. We create a desktop icon tick and click Next. Install. Finish. After completing the installation process with Finish, the Install configration page will open. You will choose the version of Windows you use here. Select POS-80C from the Select printer series section. Install Now. On the next page, you will see the printer features. With which port we will use the printer, we select the port we want from the ports section. In order to set up IP, we select Add port from the ports section, we select Standard TCP / IP Port. We say next. We write the current IP of the printer on the opened page.
We download the zy-306 printer driver from our site. We are running V8.0.exe in the Windows driver folder. Next. Next again. We create a desktop icon tick and click Next. Install. Finish. After completing the installation process with Finish, the Install configration page will open. You will choose the version of Windows you use here. Select POS-80C from the Select printer series section. Install Now. On the next page, you will see the printer features. With which port we will use the printer, we select the port we want from the ports section. In order to set up IP, we select Add port from the ports section, we select Standard TCP / IP Port. We say next. We write the current IP of the printer on the opened page.
We download the zy-306 printer driver from our site. We are running V8.0.exe in the Windows driver folder. Next. Next again. We create a desktop icon tick and click Next. Install. Finish. After completing the installation process with Finish, the Install configration page will open. You will choose the version of Windows you use here. Select POS-80C from the Select printer series section. Install Now. On the next page, you will see the printer features. With which port we will use the printer, we select the port we want from the ports section. In order to set up IP, we select Add port from the ports section, we select Standard TCP / IP Port. We say next. We write the current IP of the printer on the opened page.
We download the zy-306 printer driver from our site. We are running V8.0.exe in the Windows driver folder. Next. Next again. We create a desktop icon tick and click Next. Install. Finish. After completing the installation process with Finish, the Install configration page will open. You will choose the version of Windows you use here. Select POS-80C from the Select printer series section. Install Now. On the next page, you will see the printer features. With which port we will use the printer, we select the port we want from the ports section. In order to set up IP, we select Add port from the ports section, we select Standard TCP / IP Port. We say next. We write the current IP of the printer on the opened page.
We download the zy-306 printer driver from our site. We are running V8.0.exe in the Windows driver folder. Next. Next again. We create a desktop icon tick and click Next. Install. Finish. After completing the installation process with Finish, the Install configration page will open. You will choose the version of Windows you use here. Select POS-80C from the Select printer series section. Install Now. On the next page, you will see the printer features. With which port we will use the printer, we select the port we want from the ports section. In order to set up IP, we select Add port from the ports section, we select Standard TCP / IP Port. We say next. We write the current IP of the printer on the opened page.
We run the Printer Test V3.30C.exe file from the Tools folder in the zy-306 driver that we downloaded from our site. Connect after selecting the port to which the printer is connected. Connection Succesufuly after seeing Advanced. Then we will write 39 in the Code page set section. After making Set Code Page, we turn the printer off and on. Our transaction is completed.
After downloading the zj-8260 driveri from our site, extract the file from RAR to the folder. Devices and printers. Add a printer. Add a local printer. Select the port. There is a floppy disk. Browse. We get the ZJPOS80.inf file inside the file we downloaded with the help of double click. OK. Further. The ileri.i. End. We right click on the Printer installed for the Ethernet setup and select the printer features. Ports. Add port. We choose standard TCP / IP Port. Further . We write the current IP number of the printer in the name and IP address of the printer. Further. Device type Press letter G. We see the Genetic Network Card. Further. End.
Sitemizden zj-8260 driverini indirdikten sonra dosyayı RAR’dan klasöre çıkartınız. Denetim masası. Aygıtlar ve yazıcılar. Yazıcı ekle. İstediğim yazıcı listelenmiyor. El ile yapılan ayarlar. İstediğimiz bağlantı noktasını seçiyoruz. İleri. Disketi Var. Göz at. İndirdiğimiz dosyanın içindeki ZJPOS80.inf dosyasını çift tık yardımı ile alıyoruz. Tamam. İleri. Son.
After downloading the zj-8260 driveri from our site, extract the file from RAR to the folder. Devices and printers. Add a printer. Add a local printer. Select the port. There is a floppy disk. Browse. We get the ZJPOS80.inf file inside the file we downloaded with the help of double click. OK. Further. The ileri.i. End. We right click on the Printer installed for the Ethernet setup and select the printer features. Ports. Add port. We choose standard TCP / IP Port. Further . We write the current IP number of the printer in the name and IP address of the printer. Further. Device type Press letter G. We see the Genetic Network Card. Further. End.
After downloading the zj-8260 driveri from our site, extract the file from RAR to the folder. Control Panel. Devices and printers. Add a printer. The printer I requested is not listed. Manual settings. We select the port we want. Further. Have Disk. Browse. We get the ZJPOS80.inf file inside the file we downloaded with the help of double click. OK. Further. End. We right click on the Printer installed for the Ethernet setup and select the printer features. Ports. Add port. We choose standard TCP / IP Port. Further . We write the current IP number of the printer in the name and IP address of the printer. Further. Device type Press letter G. We see the Genetic Network Card. Further. End.
![]()
Our Company has been operating since 2006,has obtained the patent of POS CLASS brand since 2012 and started to import itself.Had taken its place in the hardware industy.
Center/Factory 29 Ekim Mah. 2174 Sk. No:21, Buca, İzmir
Istanbul Regional Office Yukarı Dudullu District Gazali Street B Blok No.6A Ümraniye / İSTANBUL
Istanbul Warehouse / Technical Service Yukarı Dudullu District Gazali Street C Blok No.4A Ümraniye / İSTANBUL
Office Number: 0850 242 12 12
Sales Number: 0532 137 28 28
Company Email: info@desmak.com.tr
Location: Borwse Map