
- 203 DPI Resolution
- 300mm / Second Printing Speed
- 74mm Printing Width
- 80mm Ribon Outer Diameter
- Operating Temperature 5-45°C
- 1.000.000 Cutting Life
- 96 Languages Characters Support Including English
- Automatic Paper Cutter / Partial Cut / Full Cut
| MODEL | ZY-306 | |
|---|---|---|
| Print method | drict, thermal | |
| Print Speed | 300mm/Sec | |
| Effective Print Width | 72mm / 512 dots/line | |
| Characters per line | Font A: 42 columns, 180dpi Font B : 56 columns, 180dpi | |
| Internal memory | 64MB | |
| Motherboard | ow power consumption – automatic standby mode enables 30% less power use on average | |
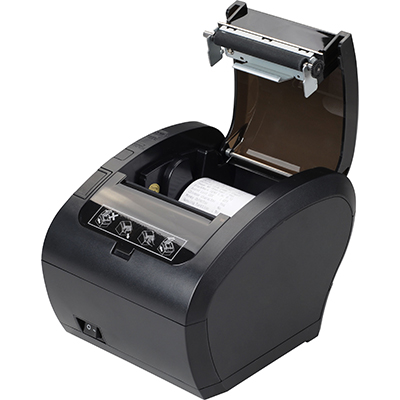
| Paper loading | automatic |
| CHARACTERS | ||
|---|---|---|
| Alphanumeric | 95 | |
| Extended graphic | 128 x 18 page | |
| International characters | 14 | |
| Barcodes | UPC - A, UPC-E, EAN-8, Code 39, Code 93, Code 128, ITF, Codabar, 2D PDF417, QR Code | |
| Emulation | ESC/POS compatible | |
| Drivers | Windows (XP, 2000, 2003, Vista, WEPOS) / Linux | |
| Sensor | end-of-roll, near end-of-roll, cover open | |
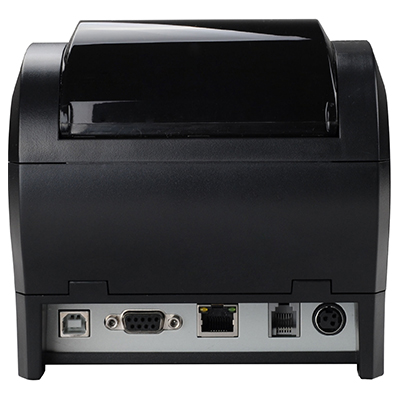
| Till output port(s) | 1 dual port (for 1 drawers) - RJ11 6-pin connector | |
| Interfaces | Triple interface RS232 Serial - USB & Ethernet dual (non-modifiable) | |
| Power supply | External 24V - 2.5A |
| PAPER CUTTER | ||
|---|---|---|
| Auto cutter | guillotine type Max. 30 cuts/minute | |
| Cut type | total or partial |
| THERMAL PRINTER | ||
|---|---|---|
| Width: | 79.5 mm +/- 0.5 mm | |
| Thickness | 0.065 - 0.1mm | |
| Max. roll diameter | 83mm |
| OTHER FEATURES | ||
|---|---|---|
| MCBF | 35-50 million lines depending on type of use and paper thickness Printer head lifespan: 160km Paper cutter lifespan: Approx. 1.5 million cuts | |
| Operating temperature | -20 to +60°C | |
| Operating humidity | 10% to 90% (without condensation) | |
| Dimensions (D x W x H) | 177 x 142 x 149mm | |
| Weight | 1.9kg box | |
| Colour | Black |
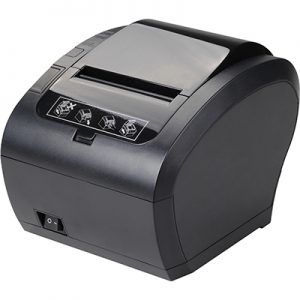
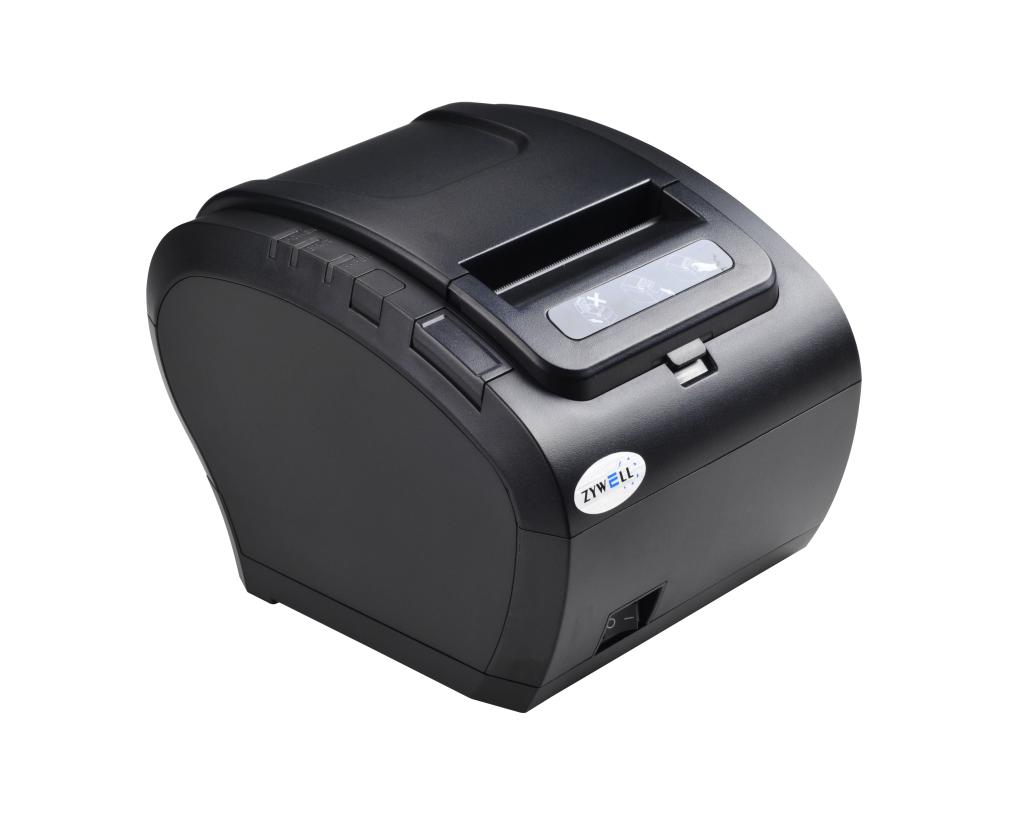
ZYWELL ZY-306 Thermal Printer Frequently Asked Questions
The principle of the thermal printer is heated after a while, which becomes a dark (usually black or blue) film covered with a layer of pale material (usually paper) transparent film. Image Heating is created by the chemical reaction created in the film. This chemical reaction is not at a certain temperature. High temperatures can speed up the chemical reaction. When the temperature is below 60,, the film should go with a long as many years as even being dark; and when its temperature is 200 ℃, this reflection will be completed within a few microseconds. By selecting a thermal printer, it is heated to a predetermined position on the corresponding graphical thermal paper. The contact with the heat sensitive material is provided by a small electric heater with the print head. The heater forms a heating element arranged in square dots or strips guided by the printer logic control with the corresponding graphic on the thermal paper. Heating elements are controlled by logic circuit but also controlling feed can get graphic label or printing on all paper.
We download the zy-306 printer driver from our site. We are running V8.0.exe in the Windows driver folder. Next. Next again. We create a desktop icon tick and click Next. Install. Finish. After completing the installation process with Finish, the Install configration page will open. You will choose the version of Windows you use here. Select POS-80C from the Select printer series section. Install Now. On the next page, you will see the printer features. With which port we will use the printer, we select the port we want from the ports section. In order to set up IP, we select Add port from the ports section, we select Standard TCP / IP Port. We say next. We write the current IP of the printer on the opened page.
We download the zy-306 printer driver from our site. We are running V8.0.exe in the Windows driver folder. Next. Next again. We create a desktop icon tick and click Next. Install. Finish. After completing the installation process with Finish, the Install configration page will open. You will choose the version of Windows you use here. Select POS-80C from the Select printer series section. Install Now. On the next page, you will see the printer features. With which port we will use the printer, we select the port we want from the ports section. In order to set up IP, we select Add port from the ports section, we select Standard TCP / IP Port. We say next. We write the current IP of the printer on the opened page.
We download the zy-306 printer driver from our site. We are running V8.0.exe in the Windows driver folder. Next. Next again. We create a desktop icon tick and click Next. Install. Finish. After completing the installation process with Finish, the Install configration page will open. You will choose the version of Windows you use here. Select POS-80C from the Select printer series section. Install Now. On the next page, you will see the printer features. With which port we will use the printer, we select the port we want from the ports section. In order to set up IP, we select Add port from the ports section, we select Standard TCP / IP Port. We say next. We write the current IP of the printer on the opened page.
We download the zy-306 printer driver from our site. We are running V8.0.exe in the Windows driver folder. Next. Next again. We create a desktop icon tick and click Next. Install. Finish. After completing the installation process with Finish, the Install configration page will open. You will choose the version of Windows you use here. Select POS-80C from the Select printer series section. Install Now. On the next page, you will see the printer features. With which port we will use the printer, we select the port we want from the ports section. In order to set up IP, we select Add port from the ports section, we select Standard TCP / IP Port. We say next. We write the current IP of the printer on the opened page.
We download the zy-306 printer driver from our site. We are running V8.0.exe in the Windows driver folder. Next. Next again. We create a desktop icon tick and click Next. Install. Finish. After completing the installation process with Finish, the Install configration page will open. You will choose the version of Windows you use here. Select POS-80C from the Select printer series section. Install Now. On the next page, you will see the printer features. With which port we will use the printer, we select the port we want from the ports section. In order to set up IP, we select Add port from the ports section, we select Standard TCP / IP Port. We say next. We write the current IP of the printer on the opened page.
We run the Printer Test V3.30C.exe file from the Tools folder in the zy-306 driver that we downloaded from our site. Connect after selecting the port to which the printer is connected. Connection Succesufuly after seeing Advanced. Then we will write 39 in the Code page set section. After making Set Code Page, we turn the printer off and on. Our transaction is completed.